GROWING
MUSHROOM IN YOUR HOUSE
INTRODUCTIONMushrooms, is an important table delicacy, contains proteins, vitamins and minerals, is low in calories (less than35 calories per 150 gm), salt, fat and has no sugars , starch and cholesterol.
There are over 2000 species of edible mushrooms. In
India we have about 50 species which can be consumed safely.
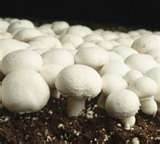
WHITE
BUTTON MUSHROOM
This mushroom is commonly known as Temperate mushroom,
European mushroom or simply the Button mushroom.
These essentially include two species”
v Agaricus
bisparus - needs temperature range
14-25˚C.v A.bittorquis – needs temperature range 19-30˚C
A.bittorquis which is cultivated widely requires
temperature of 23-25˚C for spawn run and
14-18˚C for fructification and cropping. This range of temperature is available
under natural conditions in Uttarakhand State and adjoining plains from October
to February. The cropping period can be extended up to March end, provided the
weather does not warm up.
The cultivation procedure for both A.bisparus and
A.bittorquis is almost the same, expecting the temperature range requirements.
6 STEPS
FOR MUSHROOM CULTIVATION
v Compost
preparation &Finishingv Spawning or seeding
v Casing & Pinning
v Cropping and crop husbandry practices
COMPOST
PREPARATION
The compost is the substrantum on which the button
mushroom is grown. It can be the traditional horse manure compost or prepared
compost from wheat or paddy straws. The well tested formula is given below:
Ser No
|
INGREDIENTS
|
QUANTITY IN (KG)
|
1
|
Wheat
Straw
|
300
|
2
|
Wheat
barn (Chokar)
|
15
|
3
|
CAN
|
9
|
4
|
Urea
|
3
|
5
|
Superphosphate
|
3
|
6
|
Murate
of potash
|
3
|
7
|
Molases
|
5
|
8
|
Gypsum
|
30
|
9
|
CPP
|
30 ml
|
10
|
Furadan
(3% G)
|
0.150
|
The whet straw is the kept as such for 48 hours.
Spread the wheat bran (choker) separately and mix the
fertilizers (CAN, urea, superphosphate and Murate of Potash)and moisten it with
water. This mixture is made into a heap and covered with polythene sheet for 48
hours.
This mixture is then broadcasted on the wet wheat straw
and mixed using a pitchfork.
The loss of nutrients due to leaching must be avoided
and the run off water, if any should be mixed back with the straw.
Next a stack (Pile) of 5x5x5 feet is prepared using 3
wooden boards.
This compost will weigh about 570-580 kg at 67-70 %
moisture content and is sufficient to lay about 12 sq meter of bed area.
Beds are prepared using 50 kg of this compost per sq
meter tray box container. 22-24 trays of size 100x50x20 cubic cm size can be
laid.
TURNING
OF COMPOST
The wooden boards are removed from the side.
The temperature of the stalk (pile) risesto
68-75˚C in the inner layers in24 hours
after stacking. The microbial activity during decomposition is maximum in these
hot layers as long as fresh air (oxygen)is available. To achieve this, turnings
of the stack are done, which meabs the outer portions of stack are exchanged
with the inner portions. In all 7 turnings are given to get a final grade
compost.
At each turning 10-12” layer from the stacking is
removed from all the side and the top, thoroughly mixed and wetted if need be.
The remaining stack is broken open, its contents are mixed well and water
added. If required. It is necessary to have moisture level of the above 70% at
the time of each turning.
A dry or too wet compost is liable to be of inferior
quality.The pile is then re-made in such a manner that the original central
portion forms the outer part of the new stack and the original outer portion
goes inside the new pile. Following this principle a schedule of 7 turnings is
followed as given below:
v The
first turning on 4th day
when 5 kg molasses are added to in the form of 20 liter of water.v The second turning on 8th day.
v The third turning on the 12 day when 30 kg gypsum is mixed by sprinkling the powder on the dismanteled stack and mixing it before restacking.
v The fourth turning on 16th day.
v The fifth turning on 20th day when 159 g furadan is mixed dry.
v The sixth turning on 24th day.
v The seventh turning on 28th day when 60 ml of CPP is added in the form of its solution in 15 liter water.
The compost ready is ready for use on 30th day.
CHARACTERSTICS
OF THE FINAL GRADE COMPOST
A good quality compost should possess the following
characteristics:
1. It
should be dark brown.2. It should not emit any ammonical smell
3. The compost straw should have amorphous texture
4. The pH value should be between 7.0-8.0
5. It should have adequate moisture (67-70%)
CAUTION
1. If
the compost has ammonical smell, one or two additional turnings should be given2. The adequacy of moisture in the compost can be tested by squeezing a handful quantity between palms and fingures. If it has sufficient moisture, droplets of water ooze out between the fingers. Alternatively, take 1 kg of the compost and dry it over a low flame while continuously stirring it until dry. Then weigh the dry matter and calculate the percentage of moisture as under:
3. For testing pH value, take 100 g of the compost and mix it with 100 ml water. Take the supernatant liquid and test the pH with the help of BDH pH paper strips. You will need strips of range 5.5 to 7.5 and 6.5 to 8.5. If the pH of the compost is too low or high (beyond 7-8), one can mix lime powder (to raise the pH) or gypsum powder (to lower the pH).
SPAWNING
or SEEDING
Spawning means implanting the mushroom spawn or seed in
the compost.
Spawning means implanting the mushroom spawn or seed in
the compost. There are 2 types of spawns i.e. the grain and the manure spawn.
The grain spawn is better.
Spawn should be used at the rate of 5g per kg of the
compost. One sq meter of compost will require 250 g of spawn. The spawn should
be used as early as possible after procuring it. It should be kept in a cool
place (20˚C).
To prepare for spawning, first dismantle the compost
pile and allow it to attain room temperature. Test it for correct pH (7-8) and
moisture (67-70%) and id need be adjust these within the prescribed limits.
Three types of containers can be used for filling the
compost as under:
·
Wooden crates emptied out from fruits and
vegetables.
·
Fabricated to make 7” deep boxes.
·
Polythene bags of 18” width.
·
Shelf system arranged in the shape of
racks.
The wooden racks should be washed with water and
disinfected with 4% formaldehyde solution.
The containers are filled the compost and spawned. The
spawn is taken out of the bottle and then implanted in the compost as under:
1. Single
layered
2. Two
layered
3. Mixing
In the single layered method the compost is filled into
the crates up to 6” depth and the spawn is spread at the top surface and
slightly pressed into the compost.
For the two layered method, the containers are filled
up to 3” depth and spawned with 1/3 of the required quantity of spawn. Then
more compost is added to bring it to the level of 6” depth and the remaining
2/3 rd quantity of spawn is evenly distributed on the surface and slightly
pressed in.
In the mixing method, the spawn is mixed in the compost
and this is then filled into the containers.All the three methods are unique – In the single layered spawning gives better results for early sowing of the crop – The two layered spawning is suitable for late sowing – mixing method is preferred for cultivation in polyethylene bags.
The trays/bags/shelves are filled with the compost,
spawned and are then moderately pressed to make a smooth surface. The spawned
surface is then covered wit newspaper sheets. These are then kept in the
growing rooms and sprayed with water regularly to keep the sheets moist.
CASINGThe practice of covering uniformly the spawned impregnated compost surface with a suitable soil mixture is called casing.
The ideal casing should be as under:
·
It should have neither big lumps nor should
it be very fine powder.· It should possess good water holding capacity.
· It should be porous enough to allow free flow of gaseous exchange.
· It should not be infected by pests or pathogens.
· Its pH value should be 7-8.5.
MATERIAL
FOR CASING SOIL & DISINFECTIONS
1. Farm
yard manure (1 year old)2. Garden soil (4:1)
3. Spent Compost (2 years old)
It
should be disinfected either by steam or chemicals. Chemicalsused are 4%
solution of formaldehyde and 20g Furadan per 100 kg of casing soil. 2 quintals
of the casing soil is sufficient for 10 sq meters of bed area.
The
treated soil is covered with polyethylene sheet for at least 10 hours. It then
opened and turned again and again to free it from fumes of formaldehyde. It can
be used immediately or can be stored for recasing the beds during cropping.
PROCEDURE
FOR CASING
The trays/beds show initiation of spawns run after 2-3
days of spawning. It takes about 2 weeks for the trays to show 80-100% coverage
with white myceelial growth. At this stage the newspaper sheets are removed and
spawn run surface of compost is covered with 1-1 ½” thick uniform layer of soil
casing. One sq meter bed area requires about
20 kg casing soil. The trays are then sprayed with water once/twice a
day to keep the casing layer adequately moist.
CROP
HARVESTING
After about 10 days of casing small pinheads start
appearing, scattered on the surface of the casing. The increase in size and become small buttons in the next 4-5
days. In another 3-5 days they are ready to be harvested. In brief it takes
about 30-35 days to harvest after the spawning.
The button mushrooms are the picked by gentle twisting
of the buttons and cutting the stalk at the bottom with a sharp knife.
It is important to note that while picking mushrooms
from the tray beds small pits are formed in the casing layer. These pits should
be filled with fresh casing soil. You will be able to get more mushrooms by
doing this.
The next watering should be carried out after every
harvesting. On an average the crop can be harvested for 50-60 days.
CROPING
SCHEDULE
A maximum of two crops can be obtained in a growing
season of seven months from September to March.CONCLUSION
It takes approximately 15 weeks to complete an entire
production cycle, from the start of composting to the final steaming off after
harvesting has ended. For this work a mushroom grower can expect anywhere from
0 to 1.5 kg per square foot. Final yield depends on how well a grower has
monitored and controlled the temperature, humidity, pests, and so on. All
things considered, the most important factors for good production appear to be
experience plus an intuitive feel for the biological rhythms.


No comments:
Post a Comment